Monday, March 31, 2014

Chicken Manicotti

We've all had traditional Cheese Manicotti, and oh my, they are good!  My husband, however, is not a huge fan.  Too much cheese he says. So, this dish was put together in an effort to find a balance between his taste buds and mine. It turned out pretty awesome!


Manicotti is such a cool pasta. Giant Penne-like pasta (my favorite!) that can be stuffed with your favorite fillings. The delectable layers of cheese, the tang of the yummy marinara sauce! Even my kids are all over this one! So much delicious flavor packed into one pasta tube. This meal also freezes well and re-heats like a dream.  Make it over the weekend and then pop it in the oven on a busy weeknight! It also makes a wonderful 'care package' dish; just pre-cook and then leave instructions to re-heat in the oven at 350 for about 30-40 minutes, or until it starts to bubble. Nice garden salad on the side with a little garlic bread and you have a power pasta meal that will make everyone in the house cheer!


The preparation on this meal is very flexible, too.  You can slice your own chicken, or buy pre-sliced chicken in the your meat department (like fajita-cut chicken without the spices on it).  You can also use pre-shredded cheese (guilty) or you can shred your own from a block. I like the mix that pre-shredded offers, which is why I use it, but it's not necessary. You can easily shred your own mix.

What's important is that you LOVE this dish! It will be awesome! It's quick, tastes fabulous, and makes great leftovers, if they make it that far!


Chicken Manicotti

2 chicken breasts, sliced lengthwise into 1" pieces (about 12 pieces)
1 pkg manicotti noodles
2 cups italian cheese blend, divided
1 container (15 oz) ricotta cheese
1/2 tsp pepper
2 tsp garlic salt
2 pints (1 quart) marinara sauce


Cook the noodles as directed on the package. Set them aside on a cookie sheet in a pan to cool. Get a large glass baking dish, 9 x 13, and spread a thin layer of sauce on the bottom. Meanwhile, in a bowl, mix together the ricotta cheese, 1 cup shredded cheese, pepper, and garlic salt. With a large piping tip, fill a piping bag with your cheese mix and set aside.
Take a noodle and place a chicken strip inside lengthwise. Next, pipe cheese into the noodle, filling any space that that was left after the chicken was added. Place it inside your baking dish and repeat. Continue this until all your noodles are filled and your baking dish is full, about 12.
Pour your marinara sauce over the top, making sure all the noodles are covered. Sprinkle the reserved cup of cheese over the top. Place it in an oven pre-heated to 375 for about 25-30 minutes, or until you see bubbling and the cheese is melted. Remove from the oven and let it cool for a few minutes before serving.

Monday, March 24, 2014

Curious George Wall Hangings

I always seem to end up with leftovers from quilt projects.  I'm not talking about a few scraps, I'm talking half-yard cuts! It's not a bad thing because I know I can find things to do with them.  The bad part is that often they get put into my scrap box and not looked at again for a loooong time. I have been trying very hard to make sure this doesn't happen on my projects in the last year.

That brings me to my latest finish. Now, I didn't have the crazy leftover yardage on this one that I typically do, but I still had some left that I wanted to use up.  Of course, I started by making these pillowcases to match the quilt I made, but still ended up with a few pieces.


What to do, what to do...


Oh ya! Wall hangings! What a great way to add some color to a room with a favorite childhood character! It would also be fabulous in a library or reading corner of a classroom or house! I went with a very modern pattern so that I could maximize the pieces I had left, but I also tried to keep it pretty simple.


The back is just as exciting! Frankly, as far as wall hangings go, the back could probably be used as well.  Great way to mix it up so it's not the same thing hanging all the time.  Just turn it around and you have a whole new look! Love when that happens.


I used the same type of quilting that I used on the original quilt, with the addition of some bubble/circles along the red borders.  I also used the blue thread again, which I really like on the front, but is quite bold on the back. It's all good, though, it still looks pretty cool.


I also hand-stitched the binding because it was such a quick project and I wanted to make a thinner binding, which is always difficult to sew with the machine.  On the longer hanging I also added tabs to make it easier to hang. I haven't tried this before, but I really liked how it worked out and will definitely try it again.


I am super happy with how these turned out. I kind of figured out the layout as I went, and I love doing that! I also feel good when I can use up the fabric I have left from a project so it's not laying around.  I always dream of doing a Trip Around the World with scraps, but I don't know if I have it in me to be that brave with colors. Who knows.

So now it's on to making myself a new purse. My son has been pointing out how old my other one is looking; they're so sweet like that, right? :) It gives me a chance to practice my pattern some more, and use some delicious fabrics I purchased at Keepsake Cottage in Seattle area when I visited a few months ago. More to come on all that.

I'm linking up with Crazy Mom Quilts for Finished Friday! Come on by and check out what everyone's been up to. I also have these listed on Etsy. Love to have you come by and check out the shop! Thanks for stopping by.


Friday, March 21, 2014

Sweet Thank You's

I am so behind. I feel like I have been chasing everything since this year started. It's like I slept thru a couple days and haven't been able to get caught up. I hate that feeling, but I am happy to say I am one step closer to being 'caught up' as of today.

Yes, that's right, I actually finished a task that's been gnawing at me for weeks. I finished and wrote the Thank You cards I made for my daughters birthday. I pride myself on sending out thank you's quickly, and I think this time it was particularly upsetting. Never again, I tell you! I need to have a few packs of Thank You's just waiting to be used. Unfortunately, I never feel like my pre-mades are the right fit and end up making something new.  These fit that scenario.


I actually made a similar card as Thank You's for gifts I received when my daughter was born. I really liked the design, and the particular stamp set, Buttons and Bits from Papertrey Ink Stamps. It has been such a fun set!! I made announcements, thank you's, and a set of invitations! I am sure there are tons of other things I can do with it, too.


I started with cream cardstock, although white would have worked great, too. I used a coral-pink paper that I stamped with a confetti pattern in the same color, and a deep grassy green paper from my scrap stash (yes, even cardmaking utilizes scraps, those can be some of the funnest cards!)


I stamped the cupcake in black ink on cream cardstock to match, and colored it in with Stampin' Up's chalks (you could also use colored pencils). I fussy-cut the cupcake and adhered it to the card. I stamped the sentiment on the coral-pink strip, and the final touch; I put the 'cherry' button on top! I found these beauties at Joann's and they are perfect!


Such fun making this card! It's simple, yet sweet and fun. It's also perfect for a sentiment from a little girl that's growing up way too fast! Now I can mark that off my list of to-do's and move on to the next thing. The list seems to get longer instead of shorter; what's up with that!?! It's all good; back to it!

Sunday, March 16, 2014

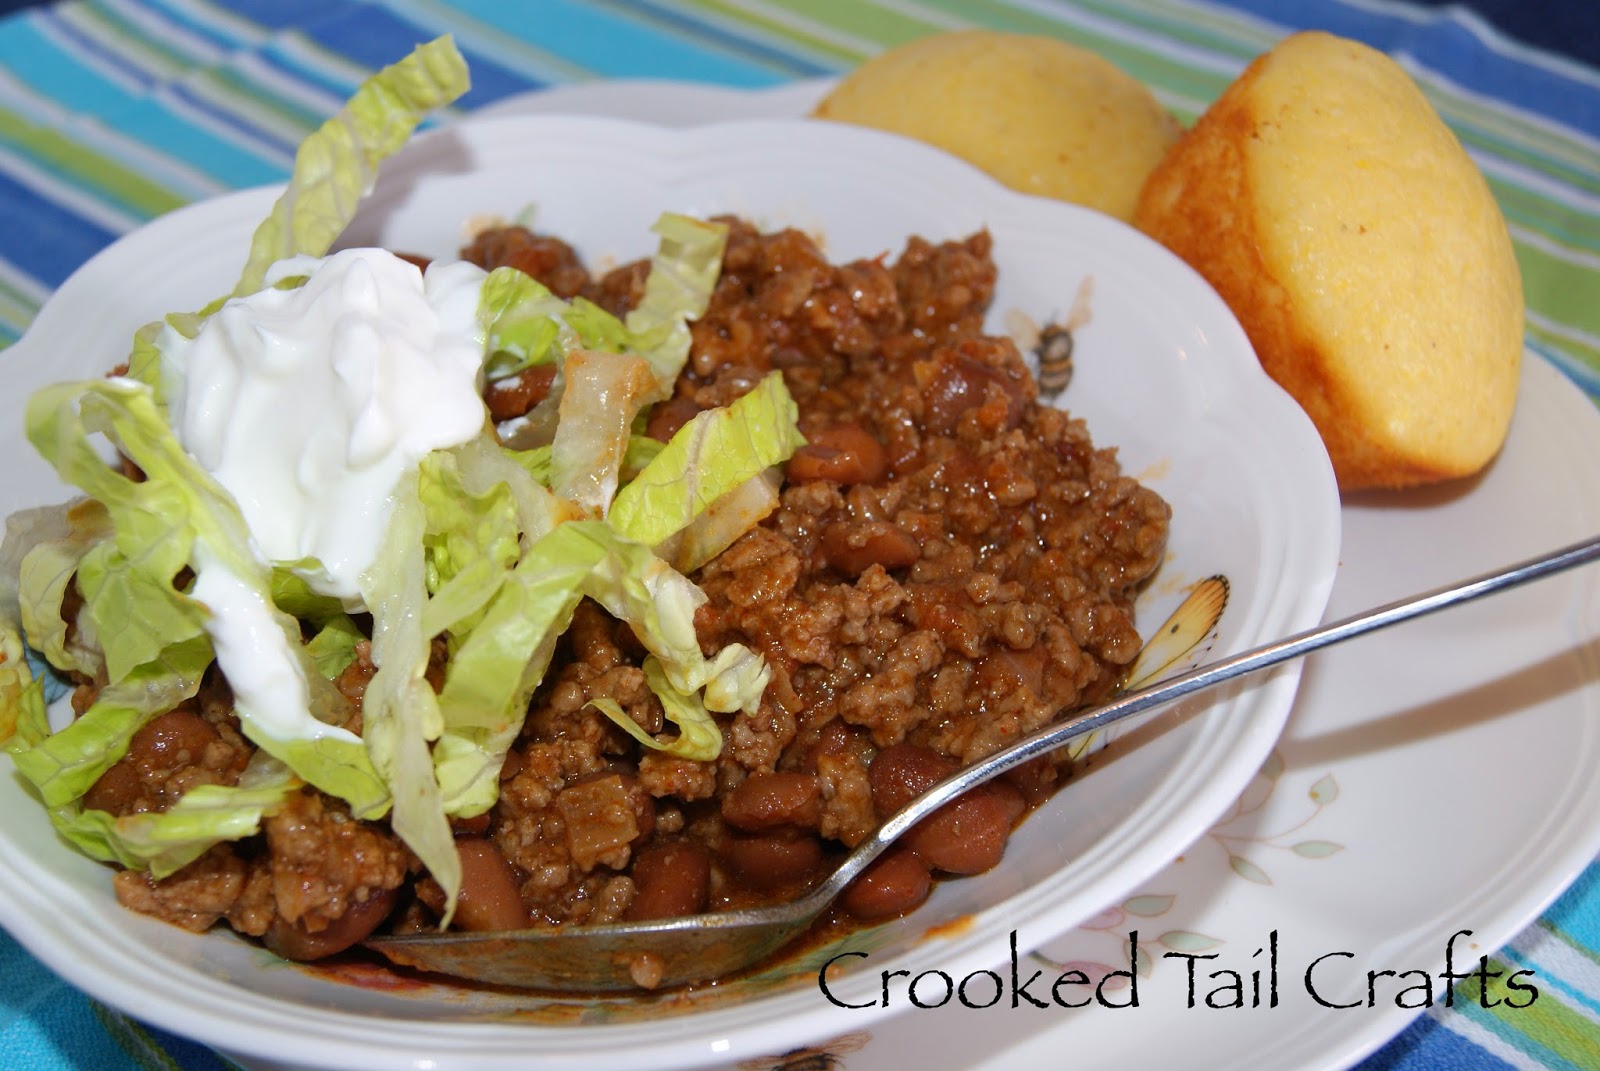
Quick and Easy Skillet Chili

There are some foods that keep you warm on a cold night, that can be eaten with all sorts of different things, that are easy and quick to make. Oh yes, even something that keeps you warm on a cold night can be quick and easy. Frankly, in my neck of the woods... or desert... there isn't much need for warm foods, but there is need for quick and easy, that's for sure. From that was born this wonderful Chili recipe.


I actually started working on this recipe with leftover taco meat, and it evolved into this yumminess. We don't do anything fancy with taco meat other than to add some onions and taco seasoning.  I have looked into making my own taco seasoning, and when I read the package describing it's contents, I discovered it's a combination of natural spices. That's it! I thought for sure it would have something that's deemed unhealthy, but no. I was relieved to know that, because I love this particular blend.  And I love what it does for my Chili.
Serve this wonderful Chili with some corn and maybe even cornbread and you'll be the dinner hero! For a healthier twist, serve on some dark-leaf lettuce. I have also put leftovers in a tortilla to make burrito's; a whole other night of dinner using leftovers that are masquerading as a new dish! Love when that happens! Little dollop of my Guacamole and you have yourself a delicious, quick, easy dinner to enjoy!


Quick and Easy Skillet Chili

1 lb ground beef
1 medium onion, chopped
1 Tbs butter
4 Tbs Taco Seasoning (I prefer McCormick)
3/4 c water
2 med tomatoes (or 1 lg tomato), chopped


Melt butter and saute the onion, about 4 minutes. Stir occasionally to keep onion from burning. Once browned and translucent, add the ground beef. Brown the meat, stirring occasionally, about 10 minutes. Drain excess fat off and add the seasoning and water; stir. Add the tomatoes and stir once more, Place the lid on your pan and allow to simmer for 15 minutes. Stir once more and serve.

Thursday, March 13, 2014

Ahh, Acrylic Stamps

If you're a stamper and you've never worked with acrylic stamps, you are totally missing out! I mean, these little beauties can take your stamping experience from, 'yeah, that looks pretty cool,' to 'holy moly, I made that!'. They are that wonderful!

I was first introduced to acrylic stamps several years ago by a friend who was a CTMH (or Close to my Heart) representative. I was curious about the fact that they could be stuck to a clear block, used, cleaned, and returned to their packaging without loosing their adhesive quality. They would still work the next time you were ready.

Okay, okay, but they won't last more than a few months. If I'm lucky I'll get a year out of them, right? No way.  These little guys just keep on working! I've had some since 2006 and they still work as well as the day I got them, and let me tell you I use them! If I'm not scrapbooking, I'm making cards, or creating good bags, or... oh the list is endless. If they ever do get a little dry, all I need to do is wipe the adhesive part with a damp cloth, dry it, and it's ready to use again. Awesome!

I tell you all this because I put a few acrylic stamp sets on my Etsy site, and if you are interested in scrapbooking, card making, or general crafting, you want these little stars! They will take your crafting from 'fun' to 'amazing'! You gotta try 'em!

The sets I have up right now are:

Close to my Heart Stamp Set, Post Marked


Inkadinkado Stamp Set, Birds and Butterflies


Inkadinkado Stamp Set, Alphabet Celebration


I'm telling you, if these don't appeal to you, look in your local craft store for something that does.  They are so much fun to work with, and it makes lining things up so much easier! Okay, that's my soapbox that is the wonder of acrylic stamps. Go forth and craft, and enjoy! 


Tuesday, March 11, 2014

Curious George Quilt

I am so excited about this one! I had a wonderful friend ask if I'd be interested in making a quilt for her son, who's about to graduate from a crib to a big boy bed. My first commissioned quilt! Bursting! His favorite character right now is Curious George, and I was on a mission.


I was surprised how challenging it ended up being finding the right fabric, but it was totally worth it. The Curious George fabrics provided a great color palette for me to work with. I had so much fun finding fabrics to match with the character fabric. 


True to my style, I am not one to follow a pattern. There is a repeat in the quilt, but I pretty much made it up as I went. First I built the blocks around the focal fabric, I created a mirror image of some of the blocks to mix it up a bit, and then I pieced the rows together and added more rows to increase the length.


I suppose when you look at it you can see some of a pattern. It was a lot of fun, though, and I like the modern feel it has. I wanted the quilt to be somewhat reversible, so the backing is all Curious George with some blue to lengthen it a bit.


I went super simple with the quilting, just doing a meander in all the blocks except on the focus fabric. I thought about some more modern FMQ, but in the end I figured a child would enjoy the meander (my son likes to trace it with his finger and pretends there's mazes for his figurines to work thru), and I was worried about time as I figured out what methods would be best.


Finally, I had some leftover fabric and I wanted to use as much as I could for her project, so I made a couple of pillowcases, one of which doubled as a bag for everything to be placed in for shipment and storage for her later on.

Loved doing this quilt! So glad I was given the opportunity, and the challenge of coming up with something. I hope I get to do with again for someone else!

Wednesday, March 5, 2014

Trying Patterns

I have really been working hard to put together my Etsy shop and try to be successful with it.  It's going well, and I am feeling good about it all. I had some feedback, or rather a request, from an admirer who asked if I had patterns for any of my creations.  It was a neat idea considering I don't really like patterns and tend to make everything up in my head anyway. Such a dork. :P

So, in an attempt to make a pattern of the oversized bag I made, I re-created it and wrote down what I did so I could make a pattern with the information.


Here's how the bag turned out.  It's not quite like my Honey Honey Bag because instead of piecing the bag together and quilting it myself, I used pre-quilted fabric.


I've never used pre-quilted fabric before, and I have to say, I'm not such a fan.  There are some nice pieces and maybe if I practiced a bit more with it I would come around. However, I think I want to stick to piecing and quilting myself.  I have so much more control.


One thing I do really like is how many pockets it has. It has two pockets on the outside and six more inside. It also has a couple of small pockets that are perfect for pens. I made this same bag in a smaller version for my sister here.


This would be the perfect bag for a quilter or scrapbooker. It's deep and wide with lots of pockets for things, and instead of putting a zipper on top, I put a button. It helps keep the bag closed while still having things stick thru the top (like, say a quilters ruler; nice!).

This was a fun project. Now, I am going to test the pattern I wrote and see if it works or not. I think this will be a fun experiment. I'm going to link up with Freshly Pieced for WIP Wednesday, and hopefully my pattern attempt will become a Finish soon.

Sunday, March 2, 2014

Cashew Chicken

I know, I know... I've said it before.  I am totally weak for chinese food (and quick dinner plans). I could probably have chinese take-out once a week and not get sick of it. That would be super expensive, and probably not very good for me, so I am always trying to recreate my favorite dishes at home.

This time, my focus was on Cashew Chicken. This dish is fabulous because it has chicken that's sauteed and not breaded, and it has a TON of veggies in it. So yummy! You actually feel good about yourself after eating this dish. You've totally earned that after-dinner cookie with this one. Love that!


It's also a really flexible dish that allows you to add whatever your tastebuds tell you to add. I went really traditional with my veggies, but really it would work with others as well. Super simple to make, leftovers are awesome, what's not to love!? Seriously, if you love chinese food, this is definitely a dish you should try. Amazing!

Cashew Chicken

½ c cashews, unsalted
1 Tbs vegetable oil
2 garlic cloves, minced
4 pieces of chicken, cubed
3 medium carrots, chopped
2 celery stalks, chopped
1 can sliced water chestnuts, drained
1 can chicken broth, divided
2 Tbs soy sauce
4 tsp cornstarch
salt and pepper to taste


Heat the oil in a wok or pan and brown the cashews, about 3 minutes (if you use roasted cashews you can skip this first step). Remove from the pan and set aside. Add the garlic to the pan and immediately place the chicken in as well. Brown the chicken on all sides, but don’t cook all the way through yet; takes about 10 minutes.
Add the vegetables, soy sauce, and 1 cup chicken broth. Simmer until vegetables are softened and chicken is cooked through; about 8 minutes. Meanwhile, mix cornstarch in ½ cup chicken broth. Add it to the chicken mix and continue to simmer until thickened; about 2-3 minutes. Return cashews to the pan and finish with salt and pepper to taste. Serve over rice.