Thursday, April 27, 2023

Mexican Kick Coleslaw


This year, my daughter and I thought it would be fun to grow cabbage in our garden. We've done cauliflower in the past and didn't find much success; maybe cabbage would be better. Oh yes, indeed! We now have cabbage coming out of our ears, and we're loving it. We're eating lots of egg rolls, cabbage rolls, sauted cabbage, and of course, coleslaw.


I have made some other recipes of coleslaw to eat with our fish tacos, but I've struggled to find a dressing that I like and the kids enjoy as well. Usually they tend to be too sour. This one hits the sweet mark just right. Not too much so it stays in the healthy category, but doesn't compromise flavor. It also doesn't have a cram base so it helps keep it a bit healthier as well. 


Now I have a new coleslaw for when we have tacos. It can be sauted fish, grilled fish or beef, a great shredded beef, or even friend fish. So many choices, allowing for a lot of variety. I love that!


Mexican Kick Coleslaw


1 medium head of cabbage, thinly sliced

¼ of a red onion, thinly sliced

2 Tbs cilantro

2 medium carrots, thinly sliced

2 Tbs lime juice, about 2 limes

1 clove garlic

1 Tbs white wine vinegar

2 Tbs agave nectar

¼ tsp hot sauce (tapatio, tabasco, etc)*

½ tsp kosher salt

1/4 tsp cumin

2 Tbs canola oil


Have the cabbage, carrots, onion, and cilantro sliced and mixed together in a bowl. Set aside.  In a separate bowl, combine the rest of the ingredients for the sauce. Use an immersion blender to blend everything together, making it almost look creamy. Pour the dressing over the cabbage mix and stir together to coat everything. Cover it and let it rest in the refrigerator for at least 30 minutes.  


* You can add more heat if you prefer. I'm trying to make sure I keep the kids interested so we keep it cool. 

Wednesday, April 12, 2023

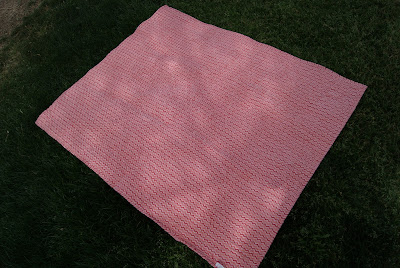
Scrappy Block Valentine Quilt


Just in time for Valentines Day, I was able to finish this beauty.  After completing a couple red and pink valentines inspired quilts, I had a lot of red and pink scraps left. Rather than tuck them away in storage, I decided I’d rather make a fun scrappy quilt with them.


My original thought was to make squares with the two different colors. I already had my piles of 2 ½ inch squares and a cute white with hearts on it for the center of each block. After completing a fair number of blocks, I realized I had a lot more squares than I first thought.


I decided to expand each block by adding scraps of the opposite color to make the block two squares instead of one, but in different colors. If the inner square is pink, the outer square is red and vice versa.


One benefit to this approach is that it adds a new level of interest and complexity. The downfall is that it made the quilt that much more busy.


I think the “more busy” is a fun thing and it works great in this quilt. It’s what scrappy quilts should be, right?


I found a great sale fabric piece at my LQS for the backing, and did a simple meander all over except on the white center blocks. The chaos of this quilt is powerful enough without an overbearing quilting pattern.


I used the excess backing to complete the binding, and added my new 2022 label. I always struggle with what year to designate a quilt. If the top is made in one year, but the quilting and completion is done another year, which is the “finish” year? 


I went with complete finish in 2022 for this one since I really did finish it in January but haven’t had time to get it on the blog.


 This was a fun way to use up a lot of scraps. When you start doing the math and realizing how many squares you just sewed together, it’s mind-blowing. Of course, then I look in my scrap bin and see hundreds more squares. Ack! Time to get to work on another scrap buster.