Monday, October 30, 2023

Prepping for Thanksgiving


We are entering the best season of the year! Fall is amazing! The temperatures are cooling down, the mornings have a slight chill in the air. Leaves are changing colors, and the smells coming from the kitchen are TO DIE FOR!


We love all the fall foods. Creating a traditional Thanksgiving dinner is so fun, and appreciated. The cranberry sauce, the dinner rolls, the mashed potatoes, and of course the turkey. But one of the traditions we’ve had the longest is my grandmas stuffing. It’s actually a German based recipe that she got from my grandfather’s family when she moved to the states. When I was old enough, I would help her with making the stuffing. It’s a process that takes a couple days of preparation, but it’s totally worth it!


I am going to share the recipe, and then share the process with pictures. I hope that it helps out my future generations and others that might enjoy trying this approach to stuffing.


Grandma’s Stuffing


1 loaf white bread*

1 large onion, chopped

1 tub unflavored shortening**

1 tsp each of: dried basil, dried oregano, dried rosemary, dried sage, dried marjoram, dried thyme, dried tarragon, poultry seasoning, garlic salt

½ tsp black pepper


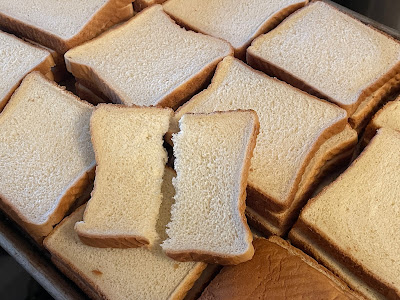
The first step is to allow the bread to become stale. To make sure it becomes stale and not dry, I use a large jelly roll pan and stack the pieces of bread in piles of two.


Once the pan is full, I cover the bread with two tea towels and set them in a corner of the kitchen for a day. If the loaf of bread doesn’t fill the pan, that’s okay. Just keep the pieces all together to help with the process.


After about 24 hours, check the bread for progress. I press the top to see if it’s feeling stale but still moist inside. I flip each pile of two pieces of bread, cover with the towel again and leave for another day.


 The second day might not need a full 24 hours, depending on how dry your climate is. The desert dries out a little faster than this.


Once the bread is ready, tear each piece into two pieces. With the tap water on a drizzle, slightly moisten the pieces of bread and roll it into a doughy ball in your hand. I can usually do one in each hand at a time. 


I keep the tap on a drizzle so I can add more water if needed, but be careful not to add too much or your bread can become soggy and unusable.


Once all the bread has been rolled into balls, heat your non-stick skillet to med-hi heat. I use an electric roasting skillet for this as I can use less fat. You can also do this on the stove top in a deep roasting pan. I add a large spoonful of shortening to the pan to melt (about 1/3 c spread around the pan).


Once melted, add the chopped onions and cook them to a nice, soft, browned color. Similar to caramelized.


Mix all of the herbs together in a bowl for later. Set aside.


Once the onions are finished, remove them and set aside.


Add another scoop of shortening (again about 1/3 c spread around the pan) and as it melts you will add your balls of bread.


To add the bread to the pan, I pick up a ball and tear it into two or three pieces and drop them carefully into the pan. Don’t let the shortening splash out as it will burn. Cover the bottom of the pan completely with half of the bread balls. You should hear the bread sizzling in the shortening and it should be getting a little darker color and crispness on some edge pieces.


Once the batch of bread is added, add more shortening; about 1/3 c on either side of the pan. Continue to let the bread brown and toast.


When you start to see some nice color in the pan, add half the onions back to the pan as well as half the herb mixture. Continue to stir, checking to make sure nothing is burning or sticking to the pan. Add more shortening as needed.


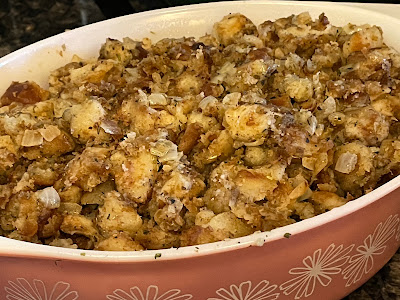
Once the stuffing is well toasted and seasoned, remove from the pan into a casserole dish.


Repeat this cooking process again with the second batch of bread balls. Once complete, add to the casserole dish with the first batch. Stir together and your stuffing is ready.


I actually make this a day or two ahead of time and reheat it in the oven on the day we’ll be eating it. Minimizes the amount of prep I need to do on feast day. Reheating in the oven also gives a nice crisp to the top of the stuffing and helps improve the fluffiness of the stuffing.


Side Notes:


*I’ve tried A LOT of different breads; butter bread, sourdough bread, whole wheat bread. I found that good old store bought white sandwich bread works best. It can also be homemade, like a tasty egg bread or sandwich bread.


**I’ve tried using butter-flavored shortening and it’s not the same. You want to use an unflavored shortening like Crisco in the blue can.


Thursday, October 26, 2023

Mouthwatering Mongolian Beef


A meal that has eluded me for years is Mongolian Beef.


I love Chinese food, but it’s really Chinese restaurant authentic family style Chinese food. I have such wonderful memories from my childhood. We’d come home with a bunch of different white food takeout boxes from the restaurant and open them all up with a spoon in each. We’d sit at the table and pass the boxes around, placing a little of each on our plates. It was so wonderful to have such variety of flavors; sweet, savory, rich, light, starchy, and meaty. We had a big family and this approach to a quick dinner was actually affordable as well. Fantastic!


Now that I’m enjoying feeding my own family, I really want to figure out how to make these wonderful meals and memories. It’s tricky though because some of the ingredients are very traditional Asian cuisine and unfamiliar. 


I’ve spent a lot of time experimenting with different flavors and learning more about what I like in my dishes and what my family likes. One of the greatest things about cooking for yourself at home is that you can make it exactly what you want and enjoy.


This meal hits home for sure. It is always in the takeout order; nobody questions whether you’ll be getting that. The trick is making sure it’s not too sweet, not too much salty soy, and not too much sauce which can overpower the meat and onions.


Mongolian Beef


1 lb sirloin or flank steak, sliced very thin

¼ c cornstarch

2Tbs EVOO

1 yellow onion

2 cloves garlic, minced

2 tsp fresh ginger, minced

¼ tsp red pepper flakes (optional)

Salt and pepper to taste

2 green onions, chopped

¼ c lite soy sauce

¼ c water

1/3 c brown sugar


It’s a good idea to prep everything before starting as the process goes fast. Slice your meat 1/8-1/4 inch thick slices. Place the meat in a bowl with the cornstarch and a pinch of salt, toss and set aside. Slice your onions thicker than your meat slices. Also, you want the green onions to be about the same as the yellow onion, so slice them about 1-2 inches long. Have your garlic and ginger ready as well as your seasonings.

Put a large pan on the stove and heat to medium-high. While that warms, mix the soy sauce, water and brown sugar together. Add oil to the pan and just as it starts to smoke, place a batch of the meat into the pan. Don’t add too much meat at a time or you won’t get a good sear. Leave it a couple minutes for the sear, and then flip the meat to sear the other side. Once both sides are seared well, set it aside on a plate and complete the other batches until all the meat it seared.

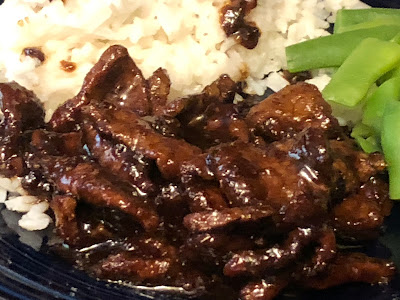
Lower the heat a little and add a bit more oil. Brown the onions to just softened and add the garlic and ginger. Stir and cook for a minute. Remove about half the onions and set aside and then add the liquid mix and bring to a boil. Once boiling, add the meat back and lower the heat to a simmer. Let it simmer for about 15-20 minutes to allow the sauce to reduce and thicken a bit. When the sauce it to your desired consistency, add back the onion and also add the green onion. Cook for a minute more and then remove from the heat. Serve over rice.


*I love veggies so I serve this with steamed broccoli. You can add the broccoli to the meal when you add the onion back at the end if you’d like to have sauce on it. Also, you can add matchstick carrots when you add the onions back as well. Great ways to get more veggies in there.

Thursday, October 5, 2023

Enchanted Butterflies Quilt


This quilt is brought to you by Riley Blake fabrics circa 2010. This is another collection of fabric that I got years ago when I had napping babies and plenty of time. Then things changed, time was lost, and I had to put it on the shelf. When the pandemic hit, I pulled out all the fabrics that I hadn’t been able to use yet and started working. This particular set finally made it to the table, and this time I had a plan. 


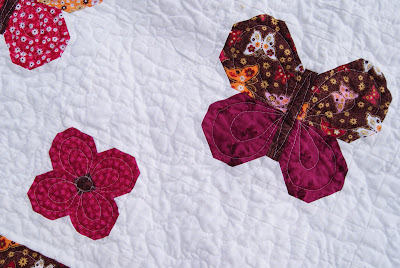
For this fabric, I knew I wanted to do a butterfly pattern. I found one I liked and used the quilt block program to figure out measurements and cuts. I wanted to make it a scrappy look, so I pulled some fabrics from my stash to fill in the gaps.


After finishing the butterflies, I realized the blocks alone weren’t quite enough for lap or twin size quilt. I decided to add sashing and thought it would be a nice opportunity to add the flowers that butterflies would want to check out. Again, I pulled fabric from my stash to keep it mixed up.


Final step was to add a border that tied all the butterflies and flowers together. This was the last piece of the collection that I saved special for this part. For the backing, I found a fun fabric at the LQS on the backings clearance rack. Perfect!


I quilted freehand outlines of the flowers and the butterflies, and then finished the rest of the quilt with a basic meander. 


For the binding, I used one of the fabrics with circles in a brown-on-brown pattern. The pictures don’t show it well, but it’s there.


This was so gratifying to finish. When I first got this set of fabric, this is what I envisioned I would be able to do with it. It feels so good when your visions come to life.


The colors confused me a bit as far as what season this may best represent. In some ways it’s spring and summer, but I think at the end of the day, this is a fall colored quilt. We still have a lot of plants blooming in the desert when fall begins and these colors definitely make me feel at home in the desert in fall. So glad it’s finished in time to enjoy this year!

Philly Cheese Steak Sandwiches


I must confess that as excited as I am about this particular meal post, I really don’t know much about philly sandwiches. I’ve never had a “real” one and can only imagine what they should taste like.  And, quite honestly, I’m pretty sure this is what they’re supposed to taste like. These are amazing! Simple flavors, amazing results.


One of the things I get frustrated with when I go out to eat is how tremendous the servings are. I can make these to fit the needs of my family; a bit smaller and easier to handle with room left for some fun sides and maybe even dessert. Mmm, cookies… brownies… ice cream…


Oops, back on topic.


The important thing to remember about this meal is that although there are multiple steps, it goes fast! It’s really important to have everything prepped before you start because once you start, it’s hard to stop for prep.


The bonus is that you can get cheese, rolls, and veggies ready way ahead of time. Like hours! Also, if you’re slicing your own meat, you definitely want to do that far ahead as well; you can do this a day in advance if you wanted. 


I love this meal. It’s heartwarming, it’s a comfort meal. It’s fun for family dinner or a buffet party night. It’s time to enjoy!


Philly Cheese Steak Sandwiches


1 lb thinly sliced steak*

2 Tbs EVOO

½ white onion, quarter slices

6-8 sweet peppers, de-seeded and sliced

1 garlic clove, minced

½ tsp coarse salt

½ tsp black pepper

4 slices provolone cheese

4 small hoagie buns **


For the Sauce:

2 Tbs butter

3 Tbs flour

1 ½ c milk

4 oz provolone cheese, shredded

Salt and pepper to taste


To make the sauce:

Melt the butter in a small saucepan. Add the flour and cook for a minute to make sure it’s cooked through. Slowly add the milk to the sauce pan, making sure to heat it through and mix it thoroughly.

Once the milk is warmed and everything is mixed, remove from the heat and slowly add the cheese a handful at a time. Stir it in to melt and then add a bit more. Continue this until all of the cheese is added. Once the sauce is done, set it aside for serving.


For the rolls:

Heat the broiler on low. Slice the rolls open and place them on a foil covered jelly roll pan (I make foil balls to place inside the rolls to hold them open while browning). Place them in the oven broiler for just a couple of minutes. Once lightly browned, pull them out of the oven and remove the foil balls. Place a slice of cheese inside each of the rolls, pressing softly down so they’ll melt into the bottom of the roll. Set them aside and prepare the meat.


For the meat filling:

Heat a skillet to med-high. Once warmed, add 1 Tbs EVOO and allow to warm but not smoke. Add the onions and peppers to brown. Continue stirring to be sure they don’t burn; you just want a nice browned caramelization. Add your garlic and cook for another minute. Once finished, remove from the skillet.

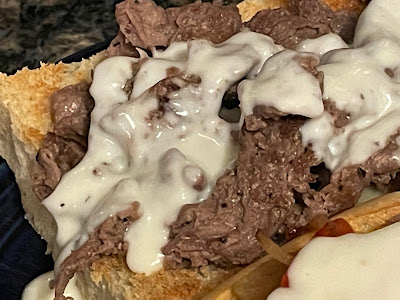
Heat another 1 Tbs of EVOO until just smoking. Place the sliced meat into to skillet and leave it to sear. Add the salt and pepper for seasoning and then stir the meat. It only takes a couple of minutes to cook the meat because it’s so thin. Don’t overcook it or the meat will become dry. Taste it to make sure there’s enough salt. At this point, you can add the pepper-onion mix back to the skillet, or you can put the meat into the hoagies and then place the pepper-onion mix on top. Add your cheese sauce to the top of the sandwich and you are ready to serve.


*I buy the pre-sliced philly sandwich meat at Kroger, but if you slice your own meat, place it in the freezer for 15-20 minutes to help make super thin slicing a little easier

**I buy small sandwich rolls instead of full size hoagie rolls. You might need to increase the amount of meat 1 ½ lbs if you use larger rolls.