Saturday, November 23, 2013

I Promise I'm Getting Things Done

I feel like I've been a total slacker about posting lately. It's not that I'm not working on things, I promise. In fact, here are some of the things I've been doing:


1. I wanted to try canning apples, so I bought a few pounds of apples and started my experimenting. My hope is that by next year I will have techniques and tastes figured out and I will be able to can a bunch of stuff, not just these small batches. I was surprised that the 5 lbs of apples I bought only made 1 quart jar and 2 pint jars.  I figure if they don't taste good straight out of the can, I can use them in an apple pie next week for Thanksgiving, right? We'll check to see how they taste in the next day or two and see if they are worthy.


2. I was on a mission to finish the Oriental Triangle Quilt. I was practicing feathers, and having thread issues (I kept running out and having to get new spools). I finally finished the quilting yesterday afternoon and now I just need to bind it. I admit, I am a little sold on the hand-binding,  so it might still take a little time to get this bad boy done. We'll see how I'm feeling when I attach the binding.


3. I have been cutting up the scraps from my Bear Paw in the Honey Quilt to make a large purse/diaper bag for myself. My old one is just sad and needs to retire.  I know the pattern I want (once again, it's in my head) and I started sewing the scraps together yesterday. It's really starting to come together nicely.  I can't wait to see the finished product.


Of course, I still have my little cat tea cups I've been working on and I've picked up a new project that someone else patched together and I am going to quilt it and bind it.  I'm excited to get to work on that project next. I have set the quilting of the Bear Paw in the Honey Jar for now. I am still not sure what to do and need to think about it a little. To be continued on that.
For now, I am going to go out in the pouring rain to ride an organized bike ride that I have been preparing for the last 10 months. Here's hoping I don't get too soaked, or cold. Deep breath, and... I'm ready to do it!

Wednesday, November 20, 2013

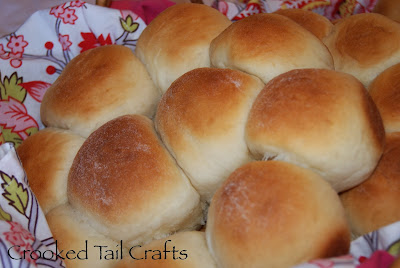
Potato Pan Rolls


I am about to share with you one of my absolute favorite bread recipes EVER! I love bread! I love making bread, eating bread, smelling bread.  I love watching the dough rise and then forming it into rolls or loaves and watching it rise again.  Maybe it's the science teacher in me, maybe it's the baker/cook in me, but I just think it's amazing!
I missed my usual Monday post because this week I am preparing for Thanksgiving and making things that I can put into the freezer for later. I was hoping to post about this bread on Monday, but by the time I finished the sun had gone down and I needed to wait until I had light again for pictures (I know, silly right?!?). I'm telling you though, this bread is totally worth the wait.


I stumbled upon this recipe many years ago from a package of free recipe cards you get when you subscribe to too many cooking magazines. I don't even remember who put it out originally.  Over the years, I have polished my technique with this bread and can actually get it done pretty quickly. I have to admit, I am not such a fan of the kneading part, and this recipe totally gets that. You use the mixer and your kneading drops down to a couple of punches and you're done. And the end result is soft, airy, buttery bread rolls for your Thanksgiving dinner, or Christmas dinner, or Tuesday night casserole dinner.  They go with everything!

Did I mention I love these rolls? :)


Potato Pan Rolls

2 medium potatoes; peeled, chopped (~1 c)
1 c potato cooking water reserved
2 pkg active dry yeast
1 t sugar
1/2 c butter, melted
1/2 c honey
1/4 c vegetable oil
2 eggs
2 t salt
6 - 7 c flour


In a saucepan, bring the potatoes to a boil in water. Boil potatoes until they are soft and easy to mash, about 15 - 20 minutes. Drain, reserving 1 c of the cooking water. While the water cools to 110 - 115 degrees, mash the potatoes and set aside.
In a mixing bowl, dissolve yeast and sugar in reserved water that's cooled to the proper temperature. Let it rise for about 5 minutes. Then, add mashed potatoes, butter, honey, oil, eggs, salt and 1 c flour. Beat until smooth and continue to add flour one cup at a time until your dough is springy and a little sticky, but no so sticky that it stays on your finger. I have found that during more humid times of the year, it takes more flour and during more dry times of the year, it takes less.  Keep that in mind as you're adding flour.
Turn your dough out on a floured surface.  Knead it for about 1-2 minutes and then place it in a buttered bowl and cover it with some towels to let it rise. It will need about an hour to double in size. Pull it out afterwards and knead it down.  Divide the dough into 3 equal pieces.  Each piece will be divided and formed into 10 dough balls, making 30 rolls total.  Place 10 rolls into a greased round cake pan, and do that 2 more times for 3 cake pans total. Cover with your towels and let the rolls rise once more for about 30 minutes.
Bake at 375F for 15-25 minutes.  I know that's a huge range, but it depends on how baked you like them.  We like our bread barely baked, which is why they are so light in color. Therefore, I only bake for about 15 minutes. My Mom likes them baked longer and bakes for 22 minutes.  It totally depends on what your preferences are. When finished baking, place them on wire racks to cool. They do freeze really well.  I place them in twist-tie bags and remove the excess air in the bag before placing them in the freezer.  To thaw them out, just pull them out, or if you forget until the last minute (been there, done that) simply put them into the microwave on defrost for a couple minutes. You are going to love these rolls!

*If you like this roll recipe, check out these variations on the original.  Sweet Potato and Whole Wheat.

Friday, November 15, 2013

Planning out Quilting Patterns

Not a very catchy title, I know, but I am so distracted by how helpful this tool is I can't even think of anything else. I was hoping to have a quilt finish today, but I lost track of time while trying to plan out the quilting on my latest project that I didn't actually get any quilting done.  This is how I was doing it...


Isn't that so cool!?! Let me explain. Several months ago on a Fons and Porter episode, they had a guest quilter showing some of the modern quilting stitches.  She showed some of the viewer tips, and this one caught my interest. It seemed like such a simple idea, and so helpful. It's basically a piece of clear vinyl with painters tape framing it.

I have to admit, when I'm figuring out what quilting to use on a particular project, I hate making practice swatches.  I like to 'practice' right on the projects I am doing.  I want to see how it looks on the actual project, for better or worse.  This tool allows me to draw with a dry-erase marker on the quilt. The quilt doesn't get hurt, I can practice my technique, and I can see how something is going to look before I start.  I can also use it to just practice in general.


I totally hate the loop meander.  I am no good at it.  I always make it too small or too big.  With this I can practice and practice without wasting paper or fabric, and without hurting any of my quilt projects. Awesome!

I'm linking up today with Crazy Mom Quilts for Finished Friday. Looking forward to seeing what everyone if finishing up.  I am starting to feel the end of the year pinch.  Lots of things I want to get done before 2013 is over. Can I make it? We'll see.

Wednesday, November 13, 2013

Practicing with Feathers

I finished this Oriental Triangles Quilt several months ago and found a backing for it this summer. Now, I finally got it pinned so I can quilt it.  I wanted to practice my FMQ feathers with this quilt, including trying to fill the space.  I saw a lot of different techniques for filling the space, including a single stem with long feathers and multiple stems with lots of small feathers. I went with the single stem and long feathers.


I am excited with how it's turning out so far. I was a little sad when nap time ended and I had to put it away. I think I could have kept going for hours. I chose the green thread because the theme of the quilt seems to be green, but this also allows for some visibility on some of the different triangles that aren't green, like this one...


I kind of wish I had mixed it up and done some with single stem and some with double stem.  When I practiced on my dry-erase panel (NEED to show you that soon; so cool!) it felt like the single stem looked and worked better so I went with it.  I guess I'll just have to make another quilt to practice the other style.  Shouldn't be a problem; I still have several projects stacked up and waiting for my attention.

I'm linking up today with Freshly Pieced for WIP Wednesday. Maybe I can get some quilting ideas for my Bear Paw in the Honey Quilt.  That's up next. I would love to hear how you think it's going; feel free to leave a comment. Have a great week!

Monday, November 11, 2013

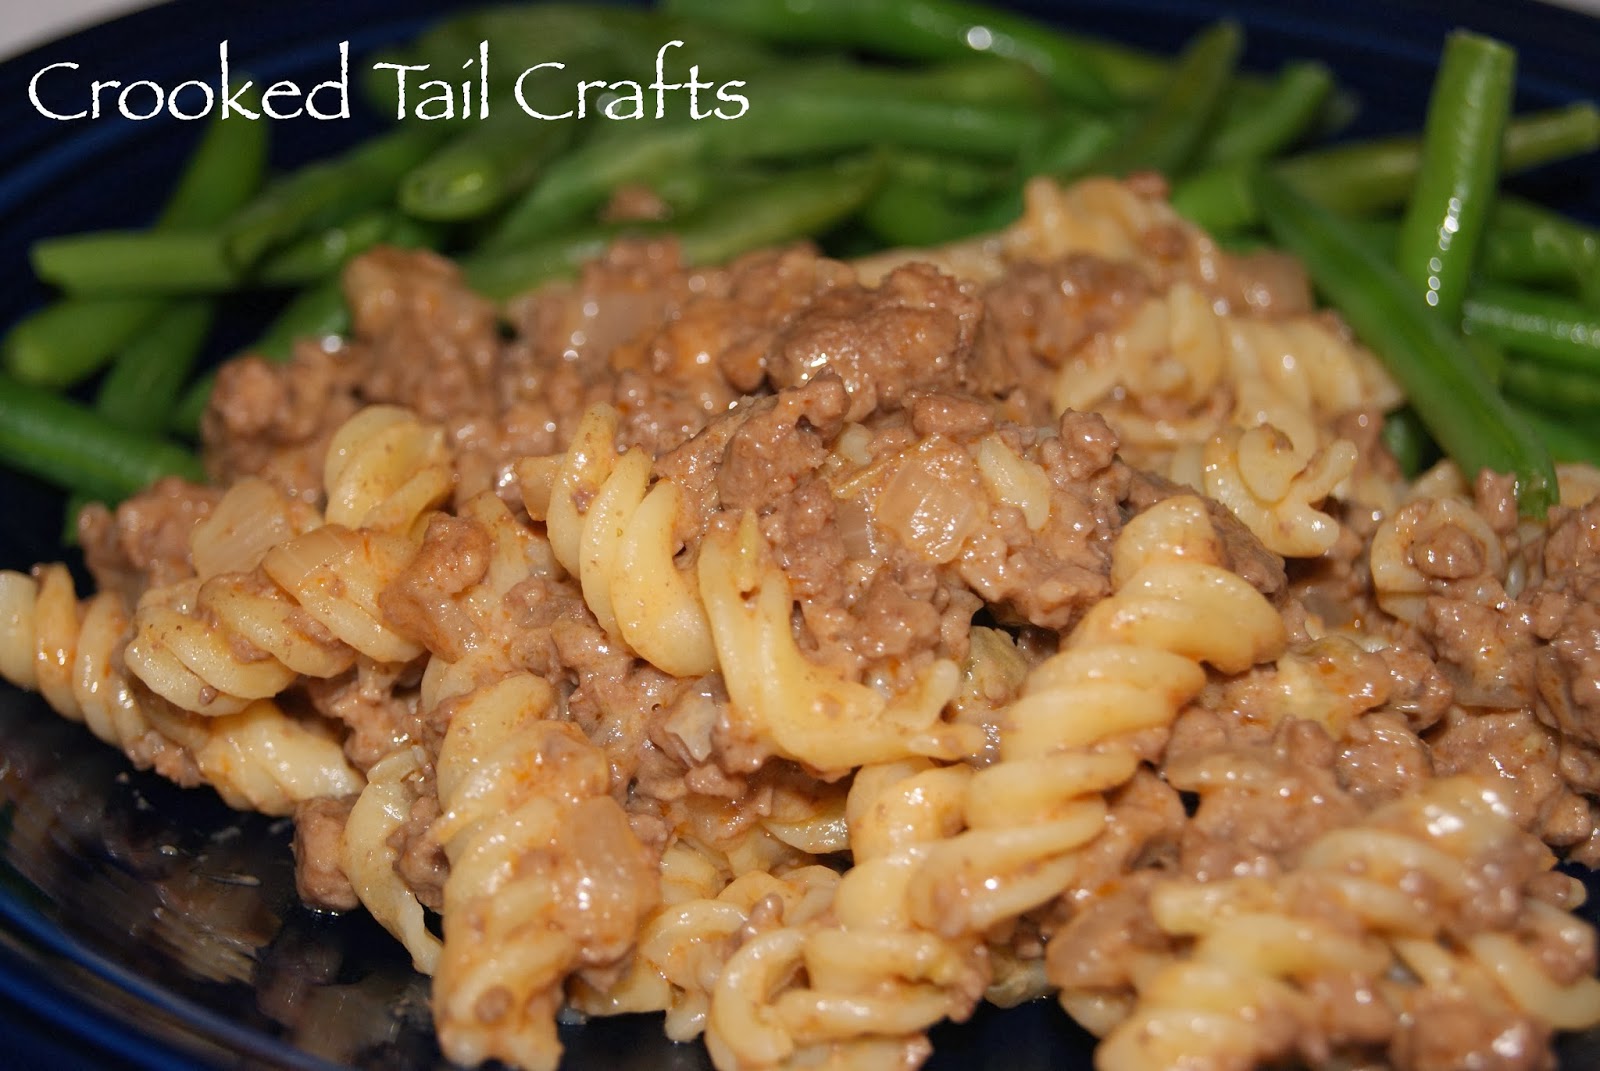
Mac'n'Beef

In our house, we tend to stick to the favorites when things are busy or crazy. I guess I just can't focus on trying something new when there's a lot of other things going on, or I'm distracted by my latest quilting project. That's when meals like this are so wonderful. It's one of my top go-to meals when I don't have much time but I still want a hot meal on the table.


This was originally adapted from a Campbells cookbook recipe. I changed a few things around, including not using a can of soup, but rather a homemade version instead. I also like to change up the noodles.  My husband prefers the rotini (corkscrew) which is the original type used, but I like penne or campanelle. Any way you go, the sauce on this beefy recipe is creamy and not overpowering. It allows the flavor of the beef and onions to come through. Definitely a good recipe to have in your , 'OMG I'm out of time today' arsenal.

Mac'n'Beef

1 lb ground beef
1 medium onion, chopped
3 Tbs butter, divided
3 Tbs flour
1/2 c milk
1/2 c chicken stock
1/4 c celery, chopped
1/4 c ketchup
1 Tbs worcestershire sauce
2 c cooked pasta (corkscrew, penne, campanelle, elbow, etc)

Cook the noodles and set aside. Meanwhile, get the sauce started by melting 2 Tbs butter in a small saucepan. Once melted, add 3 Tbs flour to create a paste. Then add the milk, chicken stock, and the celery. Bring to a boil and then reduce the heat to a simmer. Allow it to simmer, stirring occasionally, while you melt 1 Tbs butter in a large saute pan. Brown the onions. Once softened and translucent, add the beef and brown. Drain any excess fat off the meat.
To the sauce in the saucepan, add the ketchup and worcestershire sauce.  Once heated through, add it to the meat. Stir together and add the noodles. Stir it all together and you're dinner is ready. Serve with green beans, a green salad, or even carrots, and enjoy!

Friday, November 8, 2013

Oriental Friendship Quilt

When I first got into quilting, I felt like I was unable to put fabrics together.  I used many kits to help me get an idea of what works and how to organize it in the quilt. I also relied more on patterns, which is something I'm not such a fan of now. This particular quilt is a result of some of that practicing.


It is called the Friendship pattern from Pincushion Boutique and I purchased it at the local quilt show many, many years ago. I don't know why I am attracted to the oriental prints, but they are just so lovely. I chose the cream floral fabric as the background rather than white because it felt more in-keeping with the oriental theme of the quilt.


I also decided to try some of my own quilting.  This was one of my first attempts.  I wasn't thrilled with how it turned out, but it wasn't bad.  I wish I had used a colored thread instead of white, but oh well. hindsight is 20/20, right?


I have to admit, my favorite part of this quilt is the back. I finished the top in the summertime and was able to pick backing fabric from Rosie's during a trip to San Diego. I love the blue's and burgundy's.  I love the fish swimming around with the sea plants drifting around them.  It feels like a very peaceful fabric to me.  Do you have fabrics that make you feel a certain way? Peaceful, sleepy, hungry, energetic, excited? Okay, maybe that sounds silly, but this fabric is awesome and was an exciting find.


Recently, I have seen quilts using this pattern, but with modern-style fabrics. I was inspired and might look into trying it again. Maybe with a jelly roll? I think I would make it bigger, too. Not just the quilt itself, but maybe the blocks as well.  We'll see.  There's such a long line of projects that it will have to wait.

I'm linking up with Crazy Mom Quilts today for Finished Friday.  Can't wait to browse through and see what everyone else is working on.

Wednesday, November 6, 2013

Not Sure What to Quilt

I finally finished the Bear Paw in the Honey Jar Quilt top! I am so excited! Yeah!


Now comes the hard part.  How do I quilt it? Should I use templates on each block and some FMQ on the border? Should I do FMQ all over the whole quilt? Should I try incorporating some flowers and bee's in the FMQ? I think that's how the shop had the quilting done on their sample. It feels so permanent, whatever it is I decide.


I have some time to think about it. My daughter is in for her second ear surgery, so I have some time to do some research and practice some patterns on the sketch pads. Unfortunately, it means I can't work on my teacups, which I am super excited about as well, but that's okay.  They'll be waiting for me when I get home.

I also pinned another quilt in preparation for quilting; the Oriental Triangles, which I blogged about before. I think I want to practice my free-motion feathers with this one, and will use a tip I saw on Fons and Porter of using clear vinyl on our fabric and drawing the quilting with a dry-erase marker. We'll see how it goes.

Until then, I hope everyone is having a great week. I'm linking up with Freshly Pieced for WIP Wednesday. Looking forward to seeing what everyone is working on.

Monday, November 4, 2013

Cheesy Chicken

You know those go-to meals.  Those nights when you don't know what to make and don't have the energy to do much.  Or, those nights when you realize all your meat is frozen and you don't know what to do. This is the meal for you.  We have been having this meal for years, it has become almost comfort-food for us. It's a meal that's great for kids because the yummy cheese sauce can mask the healthiness of the broccoli. The creamy sauce also perfectly compliments the chicken and the rice.  And, there's so many ways to make this meal easier or more complex depending on what you're in the mood for. It started out as a can-meal type of recipe that I wanted to make a little more fresh. At the end of the recipe and description I will include tips on making this even quicker, although it's a pretty quick meal. Definitely an under-30 type of meal. Love that!

Cheesy Chicken

6 boneless, skinless chicken breasts (frozen or fresh/thawed)
2 Tbs butter
3 Tbs flour
1/2 c milk
salt and pepper to taste
1/2 c chicken stock
1/2 c mayonnaise
2 tsp lemon juice
1/4 tsp curry powder
1 c shredded cheddar cheese
2 c broccoli florets
paprika (for color)


Heat your oven to 375F. Place your chicken pieces (they can be frozen, yeah!) in a 9 x 12 glass pan and place that in the oven once it reaches the proper temperature. As the chicken begins to bake, melt the butter in a pan.  Once melted, add the flour to make a paste, and then add the milk and chicken stock. Bring that to a boil and allow it to thicken a bit (you want a soup consistency).  Add salt and pepper to taste and remove from the heat, Allow it to cool for about 10 minutes.  Meanwhile gather all of the other ingredients.

Once the chicken is no longer pink on the outside, pull it out of the oven.  Add the juices in the dish to the sauce you made in the pan. In the same pan, add the mayonnaise, the lemon juice, the curry powder, and 1/2 cup of the shredded cheddar cheese. Place the broccoli in the glass dish around the chicken, and pour the completed sauce all over the chicken and the broccoli. Sprinkle the other 1/2 cup of cheese on top and finish it with a sprinkle of paprika.  Place it back in the oven and cook for another 30 minutes, or until your chicken is no longer pink.

This goes well with white rice, but it also tastes great with brown rice. I have used minute rice, bag-o-rice and wild grain rice.  They all taste great! I have also used frozen broccoli, which I usually heat separately rather than pouring into the chicken dish.

If you want to make this recipe even simpler, use a can of cream of chicken soup instead of the butter/flour/milk/stock in the pan step. I admit that I often use pre-shredded cheese and it turns out great, but you can also use freshly shredded cheese. Oh the possibilities; this meal is so flexible and friendly!  Hope you enjoy!

Friday, November 1, 2013

Falling Leaves

We don't get many falling leaves around here.  We have to drive a good hour to find any leaves that have changed colors and are falling, so I decided I would make a quilt that mimics the fall experience.


I found this pattern many years ago.  It's called "Dancing Leaves" by Jackie Robinson at Animas Quilts Publishing. It was my first trip/experience at Rosie's in San Diego and I was able to get all the fabric at once. Clearly I was at the beginning of my quilting experience because the colors don't offer much variety, but they are all very fall-ish and that was the goal.


When quilting this, I wanted to stick to the pattern of the quilt, so I made leaves that mirrored the pattern and a stretched out stipple to create kind of a wood grain look on the borders. The leaves turned out nice, but the border is my favorite part of this quilt. I used a brown variegated thread, which always looks neat in a quilting project.


I've mentioned before I try to have a quilt for each month, and this is my November quilt. Helps us get into the spirit for Thanksgiving, and is a nice transition from Halloween.


Hope everyone enjoyed Halloween and is feeling ready to enter the Thanksgiving adventure.  I have to start thinking about what to cook, and what place-mats to serve it all on. I'm linking up with Crazy Mom Quilts.  I can't wait to see what everyone has finished up.