Tuesday, July 28, 2020

Beef Satay with Peanut Sauce of the Side

A recipe I’ve always wanted to try, and now that I’ve tried it, I don’t know why I waited so long. I have had this one tucked away in a binder full of recipes. Over the years, long before pinterest, I have been clipping recipes from various magazines, catalogs, brochures and flyers. This one came from a Lifestyle magazine that included recipes that are simple, fast, and healthy. My hubby loves peanut butter, and steak. What a better way to combine the two than this.


The best thing about this recipe is that it’s quick and easy and perfect for busy nights. It’s also a “clean” meal that doesn’t weigh you down. Easy proteins for digestion and a soft, sweet flavor of peanut butter to add interest.


This meal also reheats really well if you end up with leftovers. I’ve used leftovers of this to make salads and Chinese wraps. It’s amazing! I’m sure there’s more applications, too that I’m not even thinking of right now. Definitely worth a try.


Beef Satay with Peanut Sauce on the Side


1 ½ lbs flank steak (thinly sliced across the grain)

2 Tbs canola oil

1 ½ tsp coriander

½ tsp salt and pepper

6-8 wooden skewers, moistened


¼ c peanut butter

1 ½ Tbs light brown sugar

2 Tbs lite soy sauce

1 Tbs lime juice

3 Tbs water (more if needed)


Heat the broiler on high with the top rack 4 inches from the heat source. Slice the meat and place it in a bowl. Add the oil, coriander, salt and pepper. Mix them together making sure the meat is well coated with the oil and seasonings. Thread the meat onto the wooden skewers and place them on a rimmed baking sheet. You can line it with foil to make clean up easier. Place in the broiler, and allow to cook for 4-5 minutes for a medium cook.


Meanwhile, whisk together the peanut butter, brown sugar, soy sauce, lime juice, and water. You can add more water to thin the sauce if you prefer. Serve the sauce on the side or brush it on the meat when it comes out of the broiler. Serve with broccoli and rice for a fast and delicious meal.


Monday, July 20, 2020

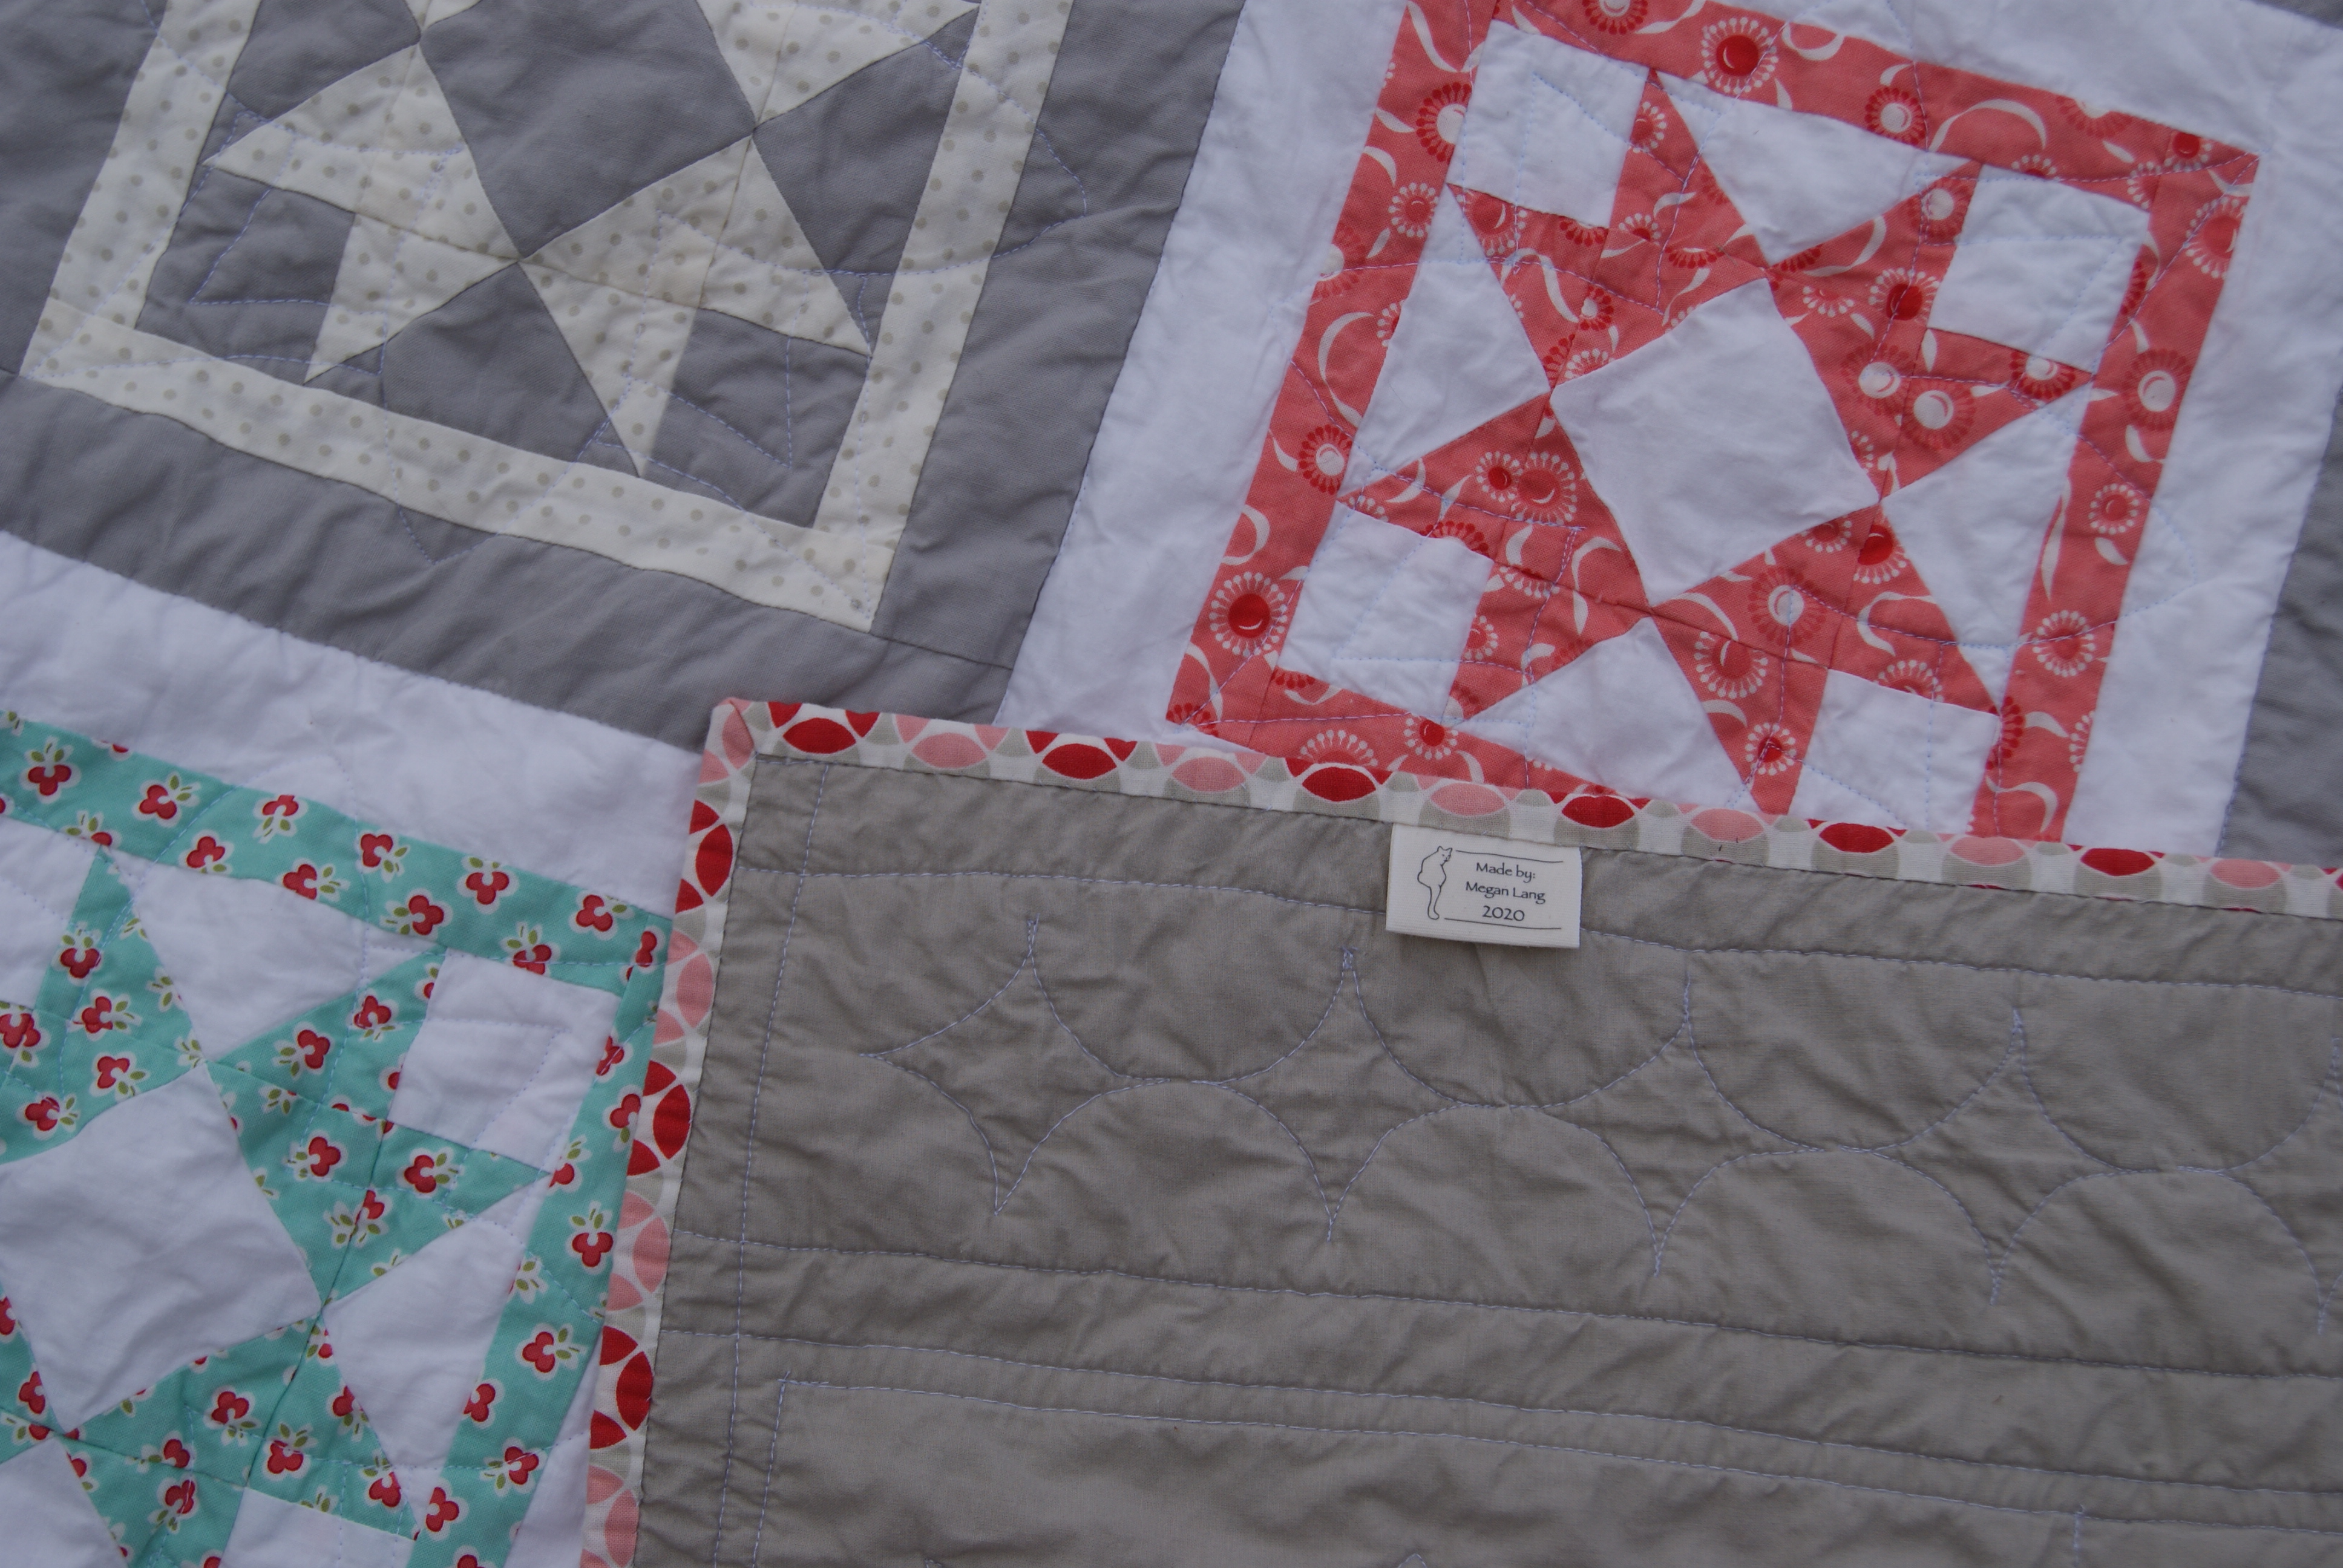
Quarantine UFO Series #5, Vintage Modern Quilt

Vintage Modern Quilt


This quilt… so beautiful… so frustrating… so glad it’s finished.


The short story for this is that I love doing my own quilting but I don’t really have the right machine for it. I love following stencil patterns and creating flowing meanders across individual blocks and borders. Don’t get me wrong, my machine is pretty good. But over the years, it has given me trouble and its age has shown. That’s how this quilt got hung up on the UFO shelf for so long.


It started in May of 2014 when I found a beautiful jellyroll of Vintage Modern fabrics from Moda. I first blogged about it here, and explained my ideas and inspiration. I was so excited! You know those moments when you have a brainstorm idea and you can’t wait to get to it and see it to completion? I got to work and was doing great, but hit a wall when I ran out of grey fabric for the base of half my blocks. It took me some time but I found more grey and finished the stars! Yeah! I blogged about completing them and preparing to complete theproject here. That’s when I hit a new wall.


This quilt is a twin size, which for my little machine and cramped quarters, is quite a beast. I quilted a few blocks and was so disappointed and frustrated with the quality that I decided I’d rather put it away and wait for the right machine to complete it than to continue ruining the top with the quilting. Into the closet it went. Since then, it has been shuffled around and moved about and pulled out of the way of other items that we’ve needed over the years. But there it continued to wait for the “right time”.


After completing a couple of UFOs and feeling more confident about finishing projects, I decided it was time to finish that quilt. Nothing has changed. I still have the same machine in the same cramped quarters. I still find it awkward and difficult to accomplish what I envisioned it being. At the end of the day though, I really love this quilt and I wanted it finished so I can enjoy it.


I got back to work with the same stencils, the same efforts, and with each block, I felt more and more confident with the process. By the time it was all done, I was actually pretty happy with how it turned out. I am glad I pushed myself to make it happen and get it done.


I finished the binding by hand and added a 2020 label. I may have started in 2014, but I finished it in 2020. I washed the quilt in the gentle cycle to get the last of the stencil markings off, and to my surprise, they didn’t come off. What’s going on? I pulled it out of the washer and got a soft toothbrush to try and rub the stencil off.  Nope, still not working. I tried ironing it off, nope. I washed it again and hoped that it would be good enough. I’m a little bummed that I finally finished this project, and I couldn’t get the chalk out. The blocks that had marker on them came out no problem. Such a disappointment. Oh well, fortunately it matched the rest of the quilt well enough that it’s hard to notice. Maybe it will fade in time or wash out next time. Either way, I have finished this project... finally! I love it and am so happy with the design.

Tuesday, July 14, 2020

My Babies Blankets Quilt

I am one of the many people in the crafting world that sets aside baby clothes and other memorabilia with the intent of creating memory quilts. But, like many others, the ideas get tabled and the beautiful items get buried in the depths of daily life. My children have gotten into grade school now and are long past the use or need for flannel nursery blankets. Still, I couldn’t get rid of them because of the memories for me so I stashed them away until I could “find the right project”.


January of 2018, we received news that my sister was expecting her first daughter. I was so excited to pass on some of our favorite clothing pieces and other useful items. I pulled all of the goodies out of the closet, and started sifting. I came across the stack of flannel receiving blankets I’d tucked away. I used them in the basinet when they first came home from the hospital as a burp cloth for the first couple of months.  Their age showed in the yellowed spots left behind even after laundering them, but they were perfect to me.


I decided to use them to make a reversible quilt for myself. One side would have pieces from my sons blankets, and the other side with pieces from my daughters. I kept it simple with 4” squares, and carefully laid them out to make sure a random appearance emerged. The green blanket appears on both sides as it was a color I used with both them.


For the quilting, I pinned the tops together back to back, making sure they lined up, and used a simple meander all over. I found some white and green plaid flannel fabric that tied the two sides together to use for the binding. Of course, I also added a date tag; good thing too. I would have forgotten when I did this had I not put a dated tag on it.


Later, I was going through my daughter’s doll stuff and found a couple more flannel receiving blankets I wish I’d known about before. Since the quilt was done, I decided it needed a bag to store it in for protection. The final blankets worked perfect, and now the project is complete. I have a wonderful memorabilia blanket to cherish as my kiddos grow up. Who knows; maybe I’ll get to pull it out as a playmat when I’m a grandma. A girl can hope, right?